
How to Make Silage: 9 Simple Steps for Better Feed
To make silage, harvest suitable forage, check its moisture, chop it evenly, pack it tightly, and seal it against air until fermentation has stabilized. Your grass is ready, rain is forecast, and tomorrow’s crew may not be available. Rushing an unplanned harvest can leave wet forage leaking from storage or loose material heating before you seal it. Understanding how to make silage helps you organize the work before that narrow harvest window arrives.
What should you prepare before making silage?
Prepare your storage, equipment, packaging, and labor before harvesting anything. Plan around the amount you can pack and seal during one working session. When deciding how to make silage, match cutting capacity with the rest of that workflow.
How much forage can you handle in one batch?
Work backward from storage capacity and daily feeding needs. A small herd may empty several small containers more reliably than one large store that stays open for days. For a shared machine, confirm who will operate it and when the next farm needs it.
- Estimate fresh forage per batch and per feeding.
- Check how many people can pack while harvesting continues.
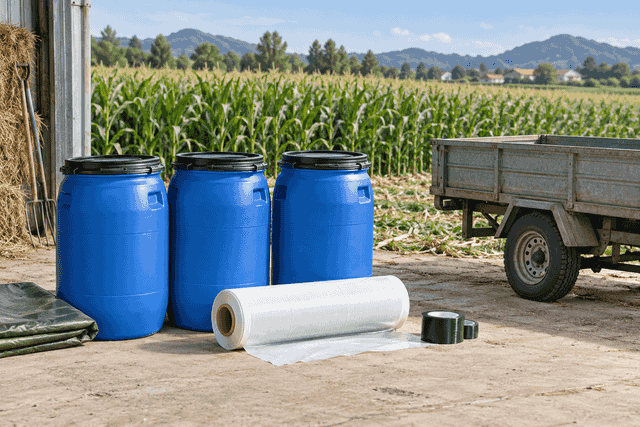
- Reserve suitable lids, liners, film, and repair tape.
Is your site ready for making silage?
Walk the route before cutting. Keep the storage surface clean, well drained, and accessible when the weather turns wet. Use containers intended for feed storage; reject barrels previously used for pesticides, fuel, or other hazardous materials.
| Preparation | Ready-to-start check |
|---|---|
| Storage | Clean, sound, and correctly sized |
| Equipment | Guards and routine service checked |
| People | Cutting, packing, and sealing assigned |
Resolve any missing item before bringing in forage. Key Takeaway: A prepared storage area prevents harvested feed from waiting while you search for supplies.
When is your crop ready for making silage?
Harvest when crop maturity and measured moisture suit your intended feed and storage system. Deciding how to make silage from corn differs from working with grass, sorghum, or small-grain forage. Plant appearance helps you choose when to sample; it cannot replace a moisture test.
Which crop signs should you inspect?
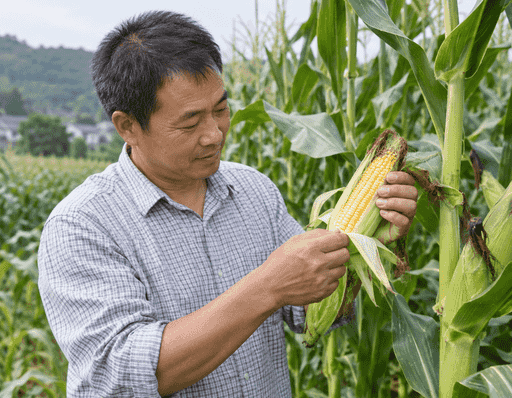
Check several representative areas instead of judging the whole field from its driest edge. For corn, kernel development can prompt sampling, but hybrid and weather differences make the milk line an unreliable moisture measurement. Penn State’s harvest guidance explains why whole-crop testing matters.
- Compare crop development across the field.
- Note lodged, dirty, or weather-damaged areas.
- Check pesticide harvest intervals and identify suspect weeds.
Should you harvest a stressed crop differently?
Separate the unusual patches. Drought-stressed forage can have different moisture and nitrate risks, even when leaves look dry. Use crop-specific sampling advice and feeding tests rather than assuming fermentation makes every stressed crop suitable. University of Minnesota Extension discusses drought-stressed corn.
| Field condition | Next action |
|---|---|
| Even crop development | Take representative samples |
| Mixed maturity | Sample contrasting areas separately |
| Drought or contamination concerns | Obtain crop-specific advice |
Let measured conditions set your harvest decision. Key Takeaway: You avoid mixing unsuitable forage into an otherwise manageable batch.
How do you measure moisture and decide whether to wilt?
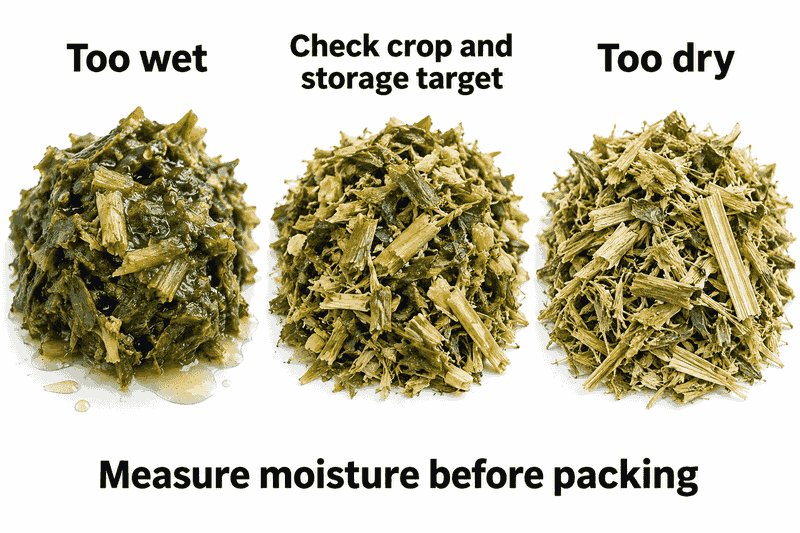
Measure representative chopped forage, then wilt or delay harvest if its moisture is unsuitable for your storage method. Moisture control belongs in every how to make silage plan because both excess water and overly dry stems can cause storage problems. A fixed number of hours in the field is an unreliable target.
Which moisture target should you use?
For whole-crop corn in horizontal silos, Penn State lists 65–70% moisture; bag storage has a broader 60–70% range. Wrapped grass bales need separate guidance, so don’t transfer a bunker target to every package. These are storage-specific examples from Penn State’s crop-moisture guidance.
- Follow a suitable forage-testing method or laboratory service.
- Sample again after wilting or rain.
- Record whether your result reports moisture or dry matter.
How do you interpret a dry-matter result?
Check which percentage you have. A sample containing 35% dry matter contains 65% water, because the two percentages total 100. Test the chopped mixture your crew will store rather than selecting only dry leaves or wet stems.
| Measurement | Meaning for your decision |
|---|---|
| 35% dry matter | 65% moisture |
| Wetter than your crop-storage target | Review wilting or harvest timing |
| Drier than your target | Reassess packing and storage suitability |
Use the result to adjust the batch before filling. Key Takeaway: Measuring moisture gives you a repeatable decision that a squeeze test or fixed wilting time cannot provide.
Which silage making equipment for small farms do you need?
You need crop-appropriate cutting equipment, a moisture-testing method, packing tools, and airtight storage. Choosing how to make silage at your scale also means deciding whether to own machinery, share it, or hire a harvesting service. A cutter handles preparation; it does not replace packing or sealing.
Which drive system fits your farm?
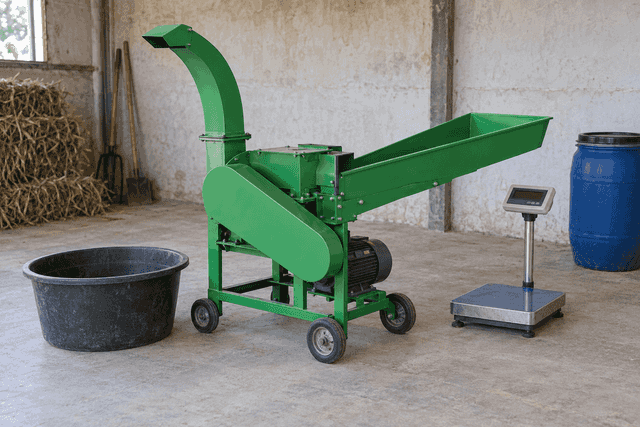
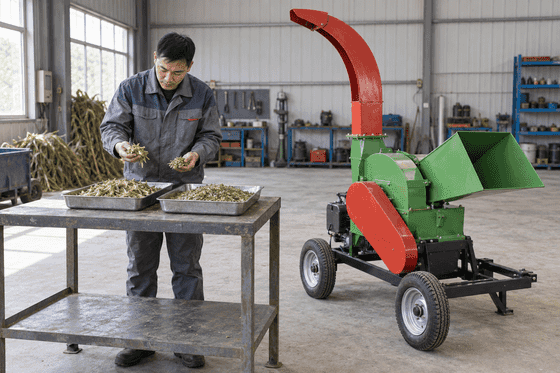
An electric chaff cutter suits a work area with a compatible power supply. If you already have a suitable tractor, compare a tractor-driven chaff cutter and confirm PTO speed, power requirements, and shaft guarding. Ask suppliers to quote the complete configuration rather than the cutting unit alone.
- Match voltage and electrical phase to your supply.
- Confirm crop handling through a relevant demonstration.
- Request manuals, wear-part references, and service requirements.
How can you compare supplier capacity claims?
Ask what the test included. Continuous machine output excludes time spent carrying forage, changing containers, and sealing lids. As a planning example, processing 1,200 kg over four available hours requires a 300 kg-per-hour average across the whole operation, before allowing for interruptions.
| Quotation item | Ask the supplier to specify |
|---|---|
| Rated output | Crop, moisture, and feeding conditions |
| Power | Motor or tractor requirements |
| Support | Parts, maintenance, and operator guidance |
Compare quotations on the same operating assumptions. Key Takeaway: Buy equipment your crew can keep supplied and your storage routine can keep up with.
How should you chop and move crops for making silage?
Chop consistently and move fresh forage straight to the prepared packing area. This part of how to make silage depends on checking actual output as crop conditions change. Avoid leaving a loose pile beside the cutter while the storage crew catches up.
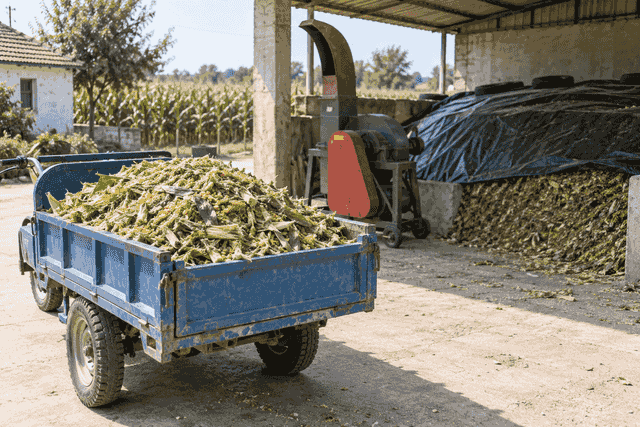
What chop length should you aim for?
Set chop length for the crop, moisture, processing method, and ration. Penn State gives roughly 10–19 mm as guidance for unprocessed corn silage and about 19 mm for processed corn silage; these settings require output checks. See its corn silage production guidance.
- Inspect a tray of forage when starting each crop.
- Look for long uncut stems and intact corn kernels.
- Shut down and isolate power before clearing blockages.
How do you avoid delays between cutting and packing?
Keep the next container ready. Use clean carts or trailers and a short transport route, with someone receiving forage as it arrives. Slow cutting when packing falls behind; increasing machine speed can make the backlog worse.
| Check | Practical response |
|---|---|
| Uneven pieces | Check blades and feeding consistency |
| Intact corn kernels | Review kernel-processing capability |
| Forage queue growing | Match harvesting to packing speed |
Check the material and the work rate together. Key Takeaway: Even chopping only helps when your crew can move and pack the crop promptly.
How do you pack forage tightly without creating unsafe work?
Pack manageable layers evenly while keeping people clear of machinery and unstable silage faces. Understanding how to make silage includes choosing a compaction method that suits your storage size. Small containers and tractor-packed bunkers require different equipment and safety arrangements.
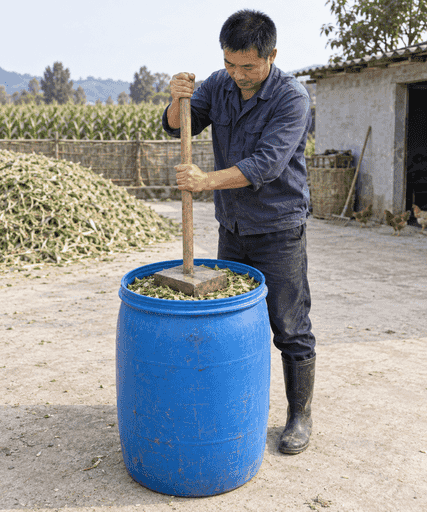
How should you fill a small container?
Add forage gradually and compact each layer with a suitable tool, paying attention to edges and corners. Long, springy stems can make this harder. If you are considering a straw kneading machine, request a crop trial to assess output and packing behavior before adding another processing stage.
- Use stable containers on level ground.
- Keep soil, stones, and loose packaging out.
- Fill according to the container’s intended closure method.
What changes when you use a bunker or pile?
Scale the safety plan with the store. Tractor compaction requires trained operators, suitable equipment, and a designed working area. Keep bystanders away, use rollover protection and seat belts, and never work beneath an overhanging silage face. Follow silage harvest safety guidance.
| Storage method | Packing priority |
|---|---|
| Barrel or small bag | Even layers and stable handling |
| Bunker or pile | Appropriate machinery and a safe working area |
| Any system | Consistent compaction without contamination |
Choose a method your operators can repeat safely. Key Takeaway: Packing must exclude air without exposing your crew to avoidable crushing or rollover hazards.
How do you seal the silage and protect it from air?
Close or cover packed forage promptly with a suitable, intact oxygen barrier. Knowing how to make silage means preparing enough packaging before operating the cutter, even for a small batch. A well-packed container still needs a dependable seal.
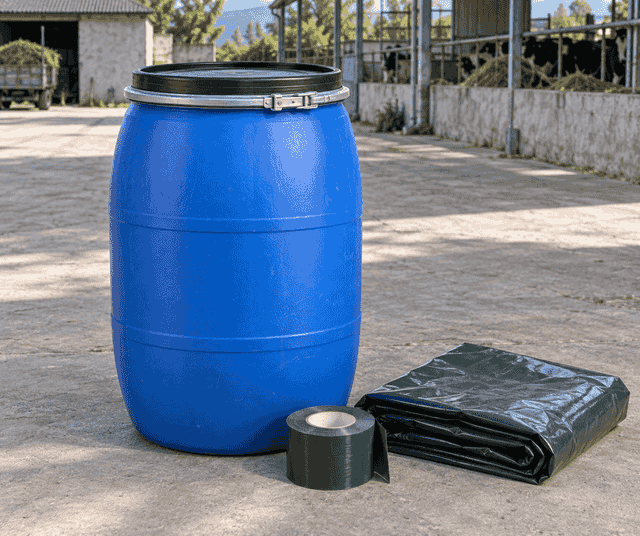
What should you inspect before closing storage?
Check lids, gaskets, bag seams, and film for damage. Follow the storage-system and film supplier’s instructions for sealing, overlapping, wrapping, or weighting. For packed corn silage, University of Maryland Extension recommends prompt covering.
- Use packaging designed for silage storage.
- Seal edges and closures as carefully as broad surfaces.
- Keep sharp objects away from bags and covers.
How do you deal with a damaged cover?
Check the outside before opening anything. Inspect after handling, strong winds, or animal damage and use suitable silage repair tape on a prepared surface. A patch limits further air entry; it cannot restore feed that has already spoiled.
| Weak point | What to do |
|---|---|
| Barrel gasket | Clean, inspect, and replace if damaged |
| Bag seam or closure | Check before moving into storage |
| Film puncture | Repair promptly with appropriate tape |
Investigate repeated damage instead of repeatedly patching the same cause. Key Takeaway: Protecting the barrier protects the work you already invested in harvesting and packing.
When can you open silage and how should you feed it out?
Open silage after an appropriate fermentation period and remove only what your animals need promptly. A complete how to make silage routine includes storage monitoring and feed-out planning. Fermentation time, feed quality, and aerobic stability are separate checks.
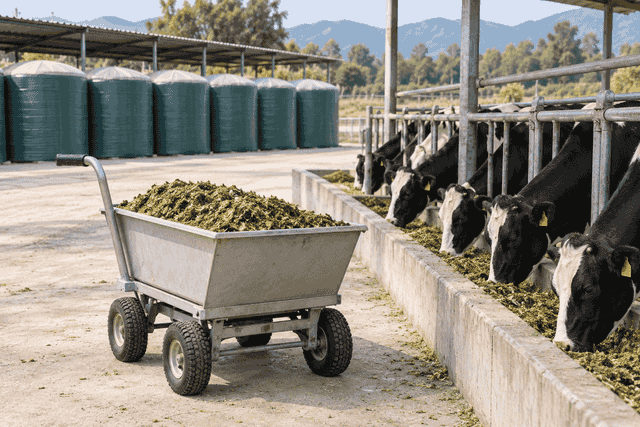
How long should you leave storage closed?
Avoid treating two weeks as a universal release date. University of Minnesota Extension recommends at least three weeks for hay-crop silage fermentation and notes that corn starch digestibility benefits from several months of storage. Its forage inventory guidance separates those needs.
- Label each batch with crop and sealing date.
- Inspect seals without repeatedly opening containers.
- Obtain feed analysis when planning the ration.
- Keep people out of enclosed silage stores; fermentation gases can be fatal.
How do you limit losses after opening?
Take only what you need for the next feeding. Minimize disturbance of remaining silage and choose storage units your herd can empty promptly. Set aside suspect material for advice and testing; smell, color, or one pH reading cannot establish feeding safety. Minnesota’s storage guidance explains careful feed removal.
| Observation | Response |
|---|---|
| Slow use of an opened container | Review batch size |
| Heating or visible mold | Separate suspect feed and investigate |
| Repeated spoilage near edges | Inspect sealing and air exposure |
Use feeding records to improve your next batch size. Key Takeaway: Preserved forage retains value only when you manage it through the last feeding.
How can you turn a trial batch into a repeatable routine?
Record the crop, moisture, processing setup, sealing date, and feeding result, then correct the main bottleneck. Your how to make silage routine should fit the people and storage you have. Expand batch size only when the smaller routine works consistently.
What should you record for the next harvest?
Keep a short batch sheet instead of relying on memory. If filling took longer than expected, identify whether cutting, transport, packing, or sealing caused the delay. Distributors can use the same records when helping customers select a workable machine configuration.
- Crop and measured moisture at filling.
- Machine setup and actual working time.
- Packaging condition and storage observations.
- Feed-test results and discarded material.
What can Golden Machinery help you specify?
Bring your trial results to the quotation. We can discuss a suitable chaff cutter configuration, power options, and parts requirements using your crop and workload. That connects the moisture, chopping, packing, and storage checks in this guide with equipment you can manage. Our position is practical: farm machinery should fit your daily work and be maintainable where you use it.
| Your trial finding | Equipment discussion |
|---|---|
| Cutting limits the crew | Crop-matched capacity and drive options |
| Uneven output | Feeding arrangement and cutting setup |
| Service causes delays | Manuals and wear-part availability |
Use those findings to request a specific proposal. Key Takeaway: Turn one measured trial into a repeatable feed routine, then contact us today to discuss the machinery that fits it.
What should you know before making silage (FAQ)?
Settle your storage method, crop targets, and feed-quality checks before cutting. These answers explain how to make silage on a manageable scale while avoiding common assumptions. Start with the system your crew can operate consistently.
Can I make silage without large harvesting machinery?
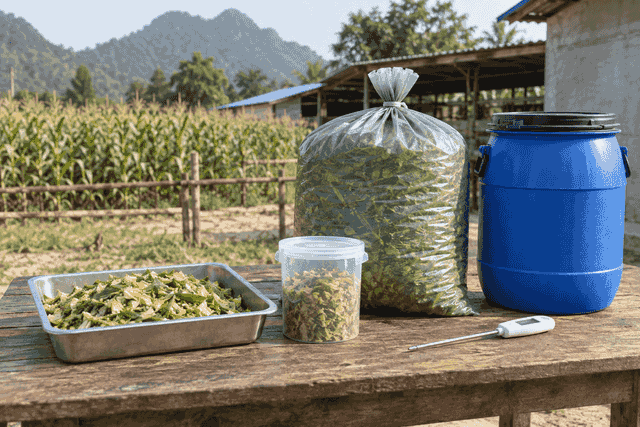
Q1: Can I make silage without a tractor? Yes, for quantities you can chop, pack, and seal with suitable small equipment. Use stable containers and a workable manual compaction method rather than copying a large-bunker routine.
Q2: Can I store silage in ordinary feed sacks? Not unless the packaging provides an appropriate airtight barrier. Woven sacks alone allow air movement; use purpose-made silage packaging or suitable sealed containers.
What’s the best way to judge moisture and crop mixing?
Q3: What’s the best way to tell whether forage is too wet? Measure a representative sample. Check the result against your storage plan: the correct target depends on both crop and storage method.
Q4: Can I mix different crops in the same batch? Sometimes, with a planned mixture and suitable moisture. Mixing changes sugar availability, packing behavior, and feed composition, so check the combined material and ration requirements.
- Record the crops and proportions you combine.
- Recheck moisture after changing the mixture.
How do I know if stored silage is suitable to feed?
Q5: How do I know if my silage has spoiled? Heating, visible mold, slime, or an abnormal rancid odor warrant investigation. Keep suspect feed separate and obtain appropriate advice or testing; appearance alone cannot confirm safety.
Key Takeaway: Use measured crop and feed checks to decide what you store and what reaches your livestock.
